
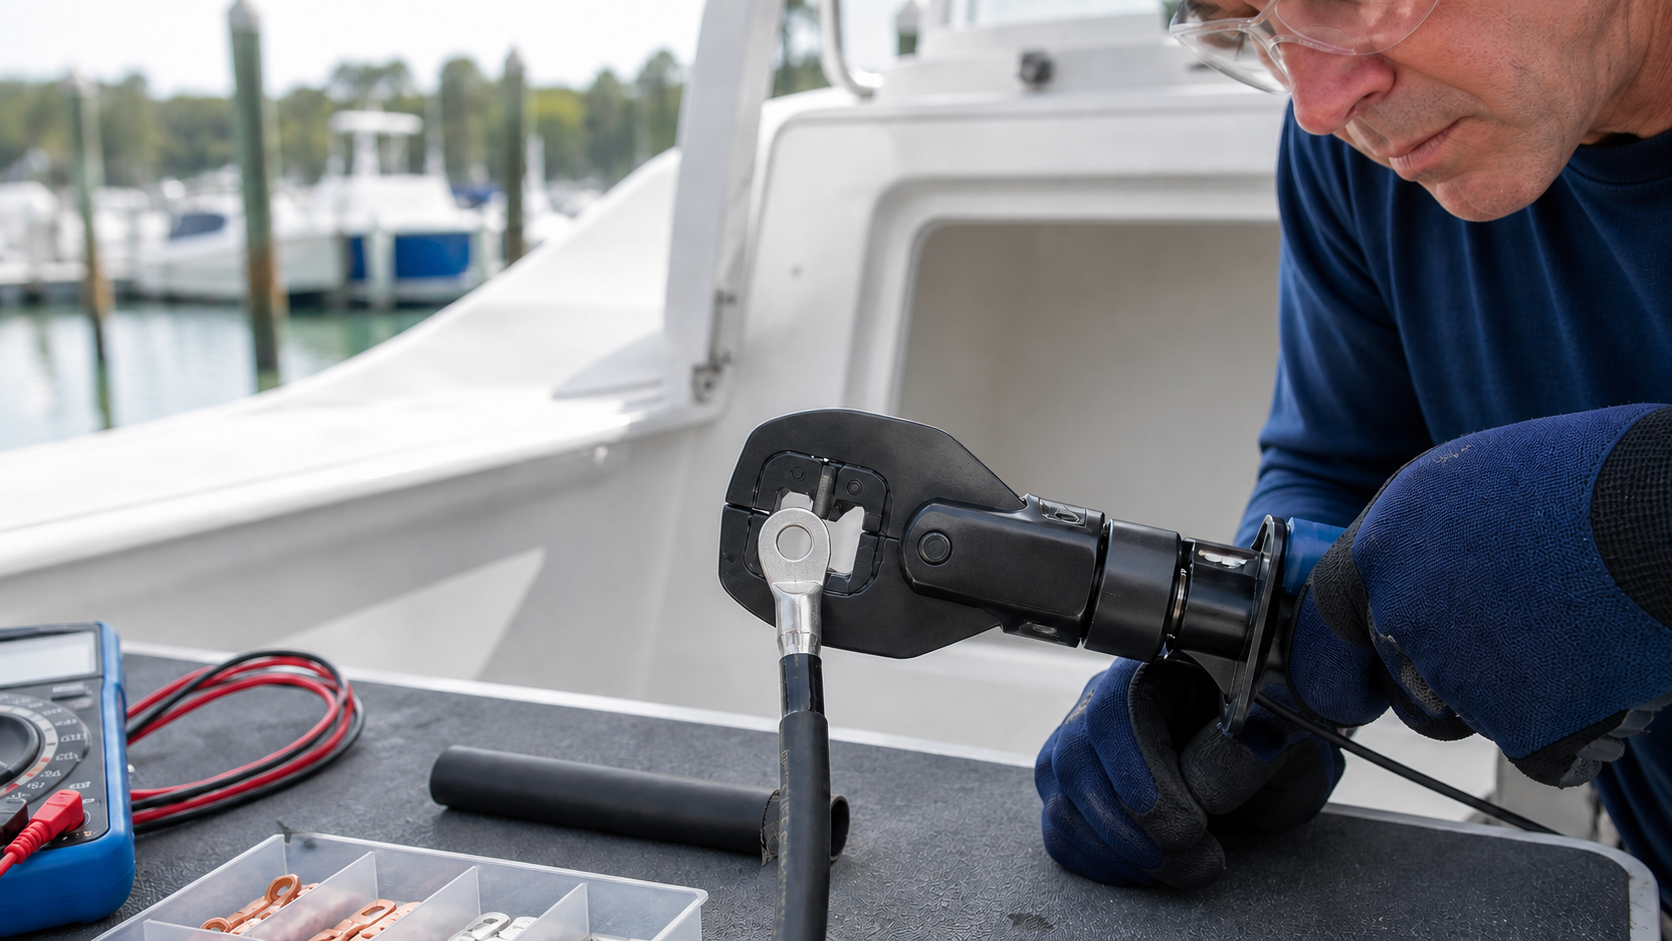
A reliable marine battery-lug connection starts with four matches: the correct cable gauge, the correct lug barrel, the correct stud-hole size and a crimper designed for that terminal. Strip the cable cleanly, make a full compression, inspect and pull-test the joint, then seal the barrel with adhesive-lined heat-shrink tubing.
This guide is for common low-voltage DC wiring on U.S. recreational boats. Federal boatbuilder rules provide useful safety baselines, but they are not a complete owner-installation manual and do not replace current manufacturer instructions or applicable ABYC standards.
What makes a marine battery lug different?
A battery lug is the compressed metal terminal that joins a heavy cable to a battery post, switch, busbar, starter, fuse block or other stud. On a boat, that connection has to survive vibration, moisture, salt, heat and high current without loosening or corroding.
Use a quality closed-end tinned-copper lug sized for both the cable and the stud. Tinned copper helps resist surface corrosion, while the closed end limits moisture intrusion from the stud side. The U.S. Coast Guard’s boatbuilder rules require insulated, stranded-copper conductors for covered systems and prohibit battery terminal connectors that depend on spring tension for their mechanical connection.
If you are still choosing the cable, read our guide to marine primary wire versus duplex wire. Cable construction, circuit length, current and voltage drop should be settled before you choose a lug.
Tools and materials
- Marine-grade stranded copper battery cable in the required gauge
- Closed-end tinned-copper lugs that match the cable gauge and stud diameter
- A crimper and die intended for the lug size and construction
- A sharp cable cutter
- A controlled stripping tool or knife used carefully
- Marine-grade adhesive-lined heat-shrink tubing
- Heat gun
- Eye protection and insulated covers for exposed positive conductors
- Multimeter and, for final diagnosis, equipment suitable for a voltage-drop test
One available option is a set of SELTERM tinned-copper battery lugs. Buy by the exact AWG cable size and stud-hole size you need; a good brand does not make the wrong size acceptable.
How to choose the correct lug
Match the cable gauge
The lug barrel should be marked for the same AWG size as the cable. Do not remove strands to make a cable fit an undersized lug, and do not fill an oversized barrel with solder or loose copper. Fine-stranded marine cable can have a different outside diameter from automotive cable even when the stated gauge is the same, so confirm the lug and tool manufacturers’ compatibility.
Match the stud-hole size
The ring should fit the terminal stud without drilling, filing or leaving excessive play. A 5/16-inch stud and a 3/8-inch stud require different lugs even when the cable gauge is identical. Check the battery, switch or busbar documentation rather than measuring by eye.
Use the specified crimp geometry
Crimp tools are not universal. The die has to form the lug barrel the way its manufacturer intended. TE Connectivity’s crimp guidance emphasizes matching the wire, terminal and tooling; the same principle applies to heavy marine lugs. A hammer, bench vise or generic pliers can make a connection that looks compressed but has poor strand contact and low pull strength.
How to crimp and seal a marine battery lug
1. Shut down and document the system
Photograph and label the existing cable routing before disconnecting anything. Turn off loads and charging sources, disconnect shore power and follow the system manufacturer’s sequence. On a typical negative-ground single-battery system, remove the negative cable first, then the positive cable. Cover any conductor that could contact metal.
Multi-battery banks, automatic charging relays, solar controllers and inverters can leave unexpected sources energized. Verify with an appropriate meter instead of assuming that turning the battery switch to OFF made every cable safe.
2. Inspect the cable before reusing it
Cut back to bright, clean copper. Replace the cable if corrosion has traveled under the insulation, strands are blackened or brittle, insulation is heat-damaged, or the remaining length will be too short for a strain-free route. A new lug cannot repair corroded cable hidden inside the jacket.
3. Cut square and slide on the heat-shrink
Use a cable cutter that leaves a round, square end without flattening or splaying the strands. Slide the heat-shrink tubing onto the cable before crimping and move it well away from the work area.
4. Strip to the barrel depth
Measure the lug barrel and remove only enough insulation for the conductor to seat fully. Avoid nicking or removing strands. Do not leave a long section of bare conductor between the lug and insulation; that exposed area invites corrosion and flexing.
5. Seat the conductor completely
Twist only enough to restore the cable’s natural lay, then insert the conductor until it bottoms in the closed-end lug. Every strand should enter the barrel. If the cable will not fit without force—or rattles in the barrel—stop and recheck the sizes.
6. Make the crimp
Select the die specified for the cable and lug. Position the lug as the tool manufacturer directs, keep the conductor fully seated and complete the entire crimp cycle. Some long barrels require more than one compression in a specified order; follow the lug and tool instructions rather than guessing.
The finished compression should be even and complete, with no cracked barrel, sharp fins or loose strands. Do not solder over a poor crimp. A solder-only joint can wick into the cable and create a stiff transition that is vulnerable to vibration.
7. Inspect and pull-test
Confirm that the lug is aligned for the cable’s final route, the conductor remains fully seated and the insulation was not trapped in the conductor crimp. Give the cable a firm hand pull as a basic screening check, not as proof that it meets a manufacturer-specified pull-force test. Follow any inspection or test requirements supplied with the matched lug and tool. Any movement between the cable and lug means the connection must be cut off and remade.
8. Seal with adhesive-lined heat-shrink
Center the tubing so it covers the lug barrel and overlaps sound cable insulation. Shrink it evenly with a heat gun until the tubing conforms and a small adhesive bead appears at the ends. Do not char the insulation.
Move the cable away from batteries, fuel vapors and combustible material before applying heat. Never use an open flame in a battery compartment.
9. Reinstall without stressing the terminal
Clean the mating surfaces and route the cable so its weight and bend do not pry on the stud. Follow the equipment manufacturer’s hardware order and torque specification. Keep current-carrying surfaces in direct metal-to-metal contact, cover the positive terminal and secure the cable against chafe and movement.
If the battery post has become a stack of accessory lugs, move the loads to a properly rated busbar instead of building a taller, less reliable pile. Our guide to mounting and protecting a marine battery covers restraint, terminal protection, ventilation and cable routing.
10. Reconnect and test under load
For a typical negative-ground system, connect positive first and negative last. Restore charging sources and loads only after checking polarity, cable clearance and terminal covers.
A continuity beep does not prove that a high-current connection is healthy. Run the intended load and measure voltage drop across the finished connection with appropriate equipment. Unexpected heating, a burning smell, unstable voltage or a larger-than-expected drop means shut down and correct the problem.
Common marine lug mistakes
- Using CCA wire: copper-clad aluminum is not a substitute for properly sized stranded-copper marine cable.
- Mixing sizes: the cable gauge, lug barrel, stud hole and die all have to match.
- Removing strands: trimming copper to fit an undersized lug reduces capacity and creates a weak joint.
- Crimping with a hammer or vise: visible flattening is not proof of a controlled compression.
- Sealing over corrosion: heat-shrink cannot stop corrosion that is already traveling beneath the insulation.
- Heating beside a battery: battery compartments can contain flammable gas, especially around charging lead-acid batteries.
- Skipping strain relief: a heavy cable should not hang from or twist the terminal stud.
- Stacking too many lugs: use a properly rated busbar and short, correctly sized feeder when the post becomes crowded.
- Testing only for continuity: a weak joint may pass a low-current meter test and fail when the starter or inverter draws current.
When to call a marine electrician
Get qualified help for damaged or overheated conductors, recurring terminal corrosion, starter or inverter cables you cannot size confidently, lithium banks with unfamiliar disconnect procedures, parallel or series banks, gasoline-engine compartments with ignition-protection concerns, or any circuit that remains energized after the expected shutdown.
Frequently asked questions
Should marine battery lugs be soldered?
Use the termination method specified by the cable, lug and equipment manufacturers. For common heavy marine lugs, a correctly matched mechanical crimp is the primary connection. Do not use solder to rescue a loose, undersized or poorly formed crimp.
What kind of heat-shrink is best for battery cables?
Use marine-grade adhesive-lined tubing sized to shrink tightly over both the lug barrel and cable insulation. Plain non-adhesive tubing does not provide the same moisture seal.
How do I know whether a crimp is good?
It should have a complete, even compression; no cracked barrel, loose strands or trapped insulation; and no movement during a firm pull test. The most meaningful final check is a voltage-drop test under the cable’s normal load.
Can I reuse an old battery lug?
No. A crimp lug is permanently deformed during installation. Cut it off, inspect the cable and install a new correctly sized terminal.
Ready to select terminals? Compare the SELTERM tinned-copper lug options, matching both cable gauge and stud-hole diameter. Do not order by the photo or assume the selected pack fits every battery stud.
Sources and further reading
- 33 CFR 183.420: Batteries
- 33 CFR 183.425: Conductors—general
- U.S. Coast Guard Boatbuilder’s Handbook: Electrical Systems
- TE Connectivity: manual crimp-tool and crimp-quality guidance
- Interstate Batteries: lithium marine battery safety manual
- Blue Sea Systems: organizing battery-terminal wiring with a busbar
Electrical standards, products and manufacturer instructions change. Confirm current requirements for your boat and equipment before modifying a battery circuit.